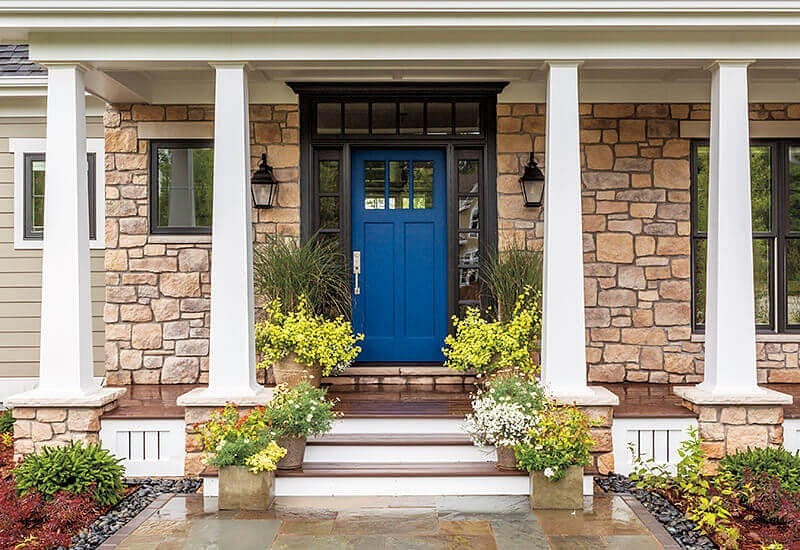
How To Paint An Entry Door
Posted
on March 15, 2017

Painting an entry door doesn’t need to be a nightmare, but it is easy to stumble over details if you start the project blind. To make sure everything comes out the way you’re hoping, read this guide, take your time and do the job right.
Assessing - should you paint your door?
First, are you painting an existing door, or adding finishing to a new entry door that was delivered without an interior or exterior finish? Re-painting over an existing finish may require some extra prep work. Make sure to review your doors owner’s manual for proper painting application/procedure, as some manufacturers have specific procedures that could impact your warranty!
SEE ALSO: CHOOSING A COLOR FOR YOUR FRONT DOOR
Finishing a new door:
If you’ve purchased a new, unfinished entry door you’ll want to apply a protective finish as soon as possible. Consider the material the door is made from to choose the proper finish. Wood doors can be gel-stained to get a beautiful look or painted to compliment your home’s trim. Is your door fiberglass or steel? If you’re unsure if your entry door is made of fiberglass or steel, place a small magnet on your door — if it sticks, it is most likely steel. Fiberglass doors and sidelights can be smooth or textured with a wood-grain finish. This material usually does not need to be primed, but painting is required. Premium steel doors are factory-primed and should be painted but not stained.
Refinishing an existing door:
If you’re hoping to change the look of your current door, evaluate the door’s condition. If it’s on its last legs, it’s perhaps not as important that you paint it flawlessly. Is painting the door a short-term fix or will you be happy with the door once its appearance is changed? Is it basic maintenance for a door you’re overall satisfied with, or is it a temporary way to salvage a door that isn’t cutting it anymore? What sort of condition is the door in — does it need replacement? How about the frame, the hinges, the knob?
Preparing - gather your materials
Once you know what you’re doing, it’s time to prep. First, you’ll need certain tools:
- Primer - using a quality primer will help you get the finish you desire.
- Exterior paint - get a proper exterior acrylic paint, not one for interior painting—you want the extra durability and the mildew-resistance of outdoor paint.
- A screwdriver - for removing hardware.
- Sanding tools - to prep surfaces for paint.
- Mildewcide cleaner or bleach - to clean the door before painting.
- A small paint roller - for the primary painting. If your door is fiberglass or steel, consider using a foam roller to avoid brush or roller marks.
- A paint brush - for the details and edgework.
- Assorted cloths, sponges, etc. - for wiping away various residues, splashes and other inevitable messes.
- Painter’s tape - to mask anything you DON’T want painted.
- Something to block your door - whether it’s a square of plywood to cover the hole or a tarp, you’ll want to fill the hole while your door dries.
*Pro tip - removing your door and painting it horizontally will give you a better finish and help avoid runs in your paint, but you may need a temporary replacement to protect your home.
Painting your door
Now that you have your equipment and your goal in mind, it’s time to commit. Wait for a good dry day without too much sunlight shining on the door if you’re painting with the door in place or prepare a well-ventilated dry space to work in if you’re removing the door. Make sure to cover the floor if you don’t want paint on it!
*Pro tip - For the best results, paint when the temperature is between 50° F and 90° F and humidity is between 65% and 70%.
- Remove all hardware, including the doorknob, lock, kick plate, etc.
- Clean the door thoroughly with a mildewcide or a bleach solution, if there’s any mildew present.
- Remove anything on the door that you want to get rid of - tape, etc. Then mask everything you don’t want painted with painter’s tape.
- Sand the entire door with fine-grit sandpaper to prepare a smooth surface for the paint, wiping away dust with a damp cloth. For weathered doors, sand more to polish out rough areas, flaking etc. Be alert to older paints, as they may contain lead and require special handling!
- Apply a thin coating of primer to the entire door. You can use the edge of the roller for fine work around edges and detailing or use a proper paintbrush. The former is less precise, the latter could potentially leave brush-marks. Allow it to dry thoroughly.
- Sand lightly to remove any burrs or rough areas that have arisen after priming, then wipe any dust away with a damp cloth.
- Stir your paint thoroughly, then apply it over the primer. Start from the center and work to the sides. Allow it to dry. If necessary, you can then sand lightly again, and apply a second layer.
- Allow the door to dry thoroughly, until the paint no longer feels tacky, before reinstalling hardware. Reseat the door if you removed it.
*Pro tip - if your door has a decorative bevel, in-lay or panels, use a brush to paint the panels first. Work quickly and make sure to not let your paint pool.
Whether you’ve purchased a new, unfinished door, or you’re looking to update your current door to enhance curb appeal, a fresh coat of paint can do wonders. With a little bit of prep work, this is a DIY you can easily accomplish on your own.
Schedule a free consultation to find windows and doors for your home.
